|
Headrest Fix for the BMW 6 series |
|
|
|
|
| Why you want to do this fix:
Isn't it embarrassing when someone presses the headrest button and instead
of it moving up and down (cool!) it makes a loud and hideous noise and just
sits there (bad) . Doesn't look too good for us. It is a
very easy fix and shouldn't take more than 45 mins. BUT why not let the
dealer fix it? Why you don't want to bring it to the dealer: Hear are two reasons 1) I have seen the dealership charge a 6er owner several hundred dollars to troubleshoot and fix this issue. 2) A fellow sixer wrote and told me this story. He told me that he was looking into fixing his headrests... "when I opened it up, I found the little piece of hanger in the collet. Reviewing the P.O. records he got charged $175 for that repair." You can do it for free which is always the best price. What happened? What are we fixing? I believe over time, with the effects of gravity and miles of vibration, the worm gear cable losses contact with the gear mechanism at the top of the seat. (pic) We are just adding a spacer to reinitiate that contact.
|
|
| Tools: Philips and Flat
head screwdriver; Needle nose pliers; .125"-.375"
piece of coat hanger ( metal rod); Ratchet w/ 10/12MM socket. Definitions: Perspective for both seats, Inside = side to emergency brake - Outside = side to the windows
|
|
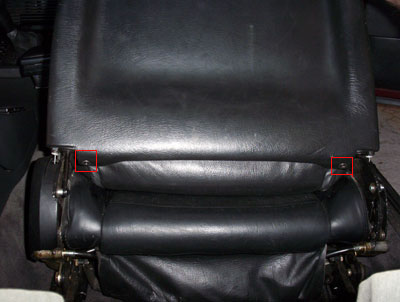
| Remove the two screws with a #2 Phillips screwdriver. |
 |
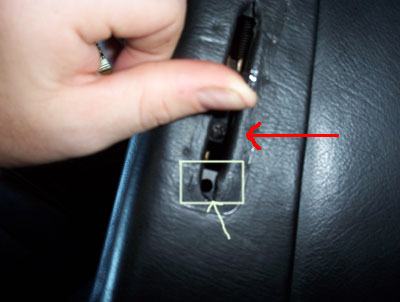
| Use a flat head screw driver and gently pry the
handle away from the guide. Firm pressure will be needed.
Use flat head screwdriver to gently pry the BOTTOM of the plastic guide piece till it releases. See Note in next step for explanation. |
|
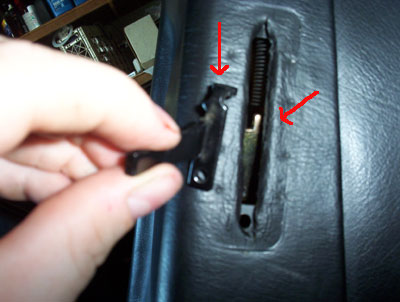
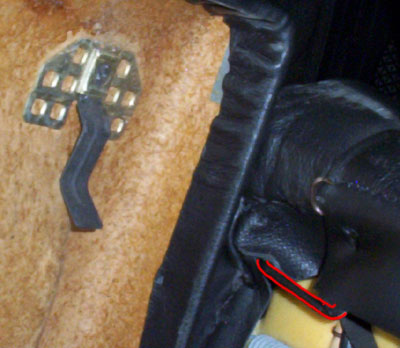
| Red arrow- Disassembly Gently press up on the lever to gain access and remove the philips screw which will release the lever. Tip: Don't worry if you lose the screw down the seat. When you take the seat back off you should be able to find it. Note: All 4 guides have the anchor point at the bottom - pry from the bottom. White square is to show the anchor point for the guide.
|
|
| You will have to pull up and out. Very easy. Note: The outside levers are as shown with the anchor point at the top and the screw at the bottom. The inside levers are the opposite, the anchor point at the bottom and the screw at the top. |
 |
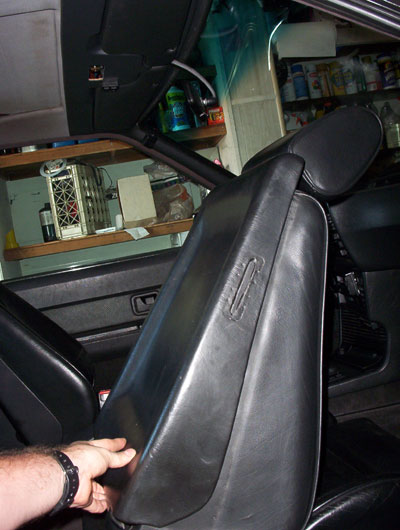
| Push up with both hands. (Mine did not loosen
up with one hand. One hand shown for stability reasons during photo session) All that is holding the back on are two pressure hooks at the top of the seat back. You will have to move it about 1 1/2" - 2" (see next pic for close up) In this picture they are fully released at this point. |
 |
| Left: pressure hook mounted to seat back Right: Red lines are to highlight the U bracket mounted on the seat. Assembly - The hook goes in the U mount..
|
 |
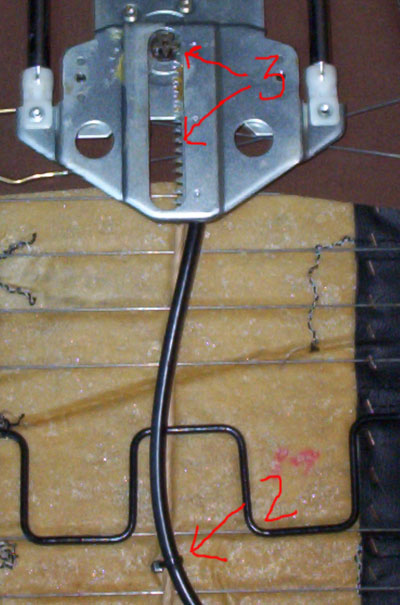
| 1. The motor - where all the work is going to
take place.
3. Gear mechanism
|
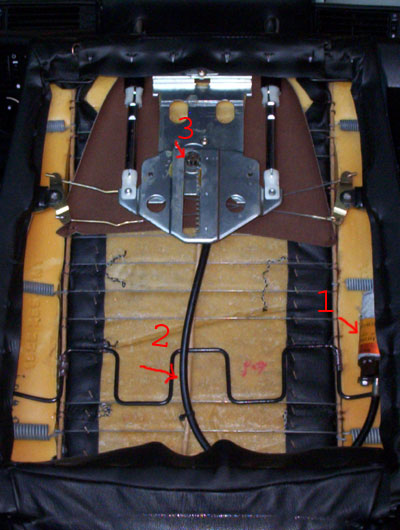 |
| Remove both of the bolts at the bottom of the motor. The worm gear should come out easily. (See next pic) |
 |
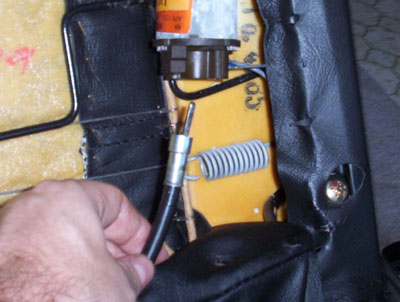
| The motor should now swing free. I just
turned the motor over for the next step. Note: There are some people, that I have read that about, that will take off part of the leather to get to a side bolt. Or even take an ex-acto knife and cut a small hole for a screw driver to get to the bolt. That does make it easier to work on. ( I took the leather off the first one by stretching it over the metal spikes and rolling back the leather) BUT it isn't necessary. This one was done without taking that bolt off. |
 |
| Cut a piece of coat hanger rod ~ 1/8"-3/8" |
coat hanger piece (pic coming soon) |
| Insert the metal piece in the center hole. |
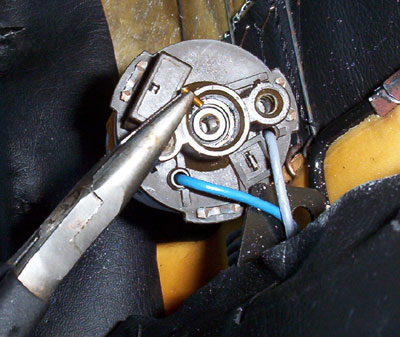 |
| This step is tricky because you have to insert
the worm gear back into the motor while making sure you don't let the metal
piece fall out. Turn the motor horizontal then insert the worm gear
cable and keep pressure on it as you reassemble. Tip: I cut the tie wrap ( located near the #2 in the next pic) holding the worm gear cable in order to have enough cable to keep pressure on it. Reassemble motor plate, worm gear cable and the two screws. |
No picture available ( I didn't have a free hand to take a picture while doing the job) |
|
Time to test your work. Check the headrests and see if they now move. (It should) |
|
| Alternate solution (not free): Another way to fix it, given to me by another sixer, was to replace the whole cable by going to a speedometer shop and he had them cut a new speedometer cable 1/4" inch longer for a $9.00 charge for two of them (unconfirmed price) | |
| #2 - Replace the plastic tie wrap. #3 - Grease the motor and the splines. I used Duralube for the motor and a heavier bearing grease for the splines. It is very quite now. |
 |
| Reinstall the seat back making sure you are aware of the hooks. |
|
| Fasten the 2 seat back screws. |
See the first picture |
| Reinstall the levers - making sure not to lose
the screws down the seat back as you won't be able to get them without some
disassembly.. Tip: Outside -After I had inserted the lever into the inner mechanism notch, I found that if i applied slight upwards pressure on the lever with my left hand and then with my right applied slightly more horizontal pressure with a Philips screw driver on the screw hole. I was able to get a straight shot to the screw hole and was able to put them in with no issues. *Magnetic screw driver tip works good here but so does putting the screw on the tip of the screw driver then apply scotch tape, taping the screw to the tip. Seemed to work as well. |
|
| Reinstall the guides. Insert the
top first,
then they snap right in. Handles - just press hard but I wouldn't recommend hitting them as they are plastic and could break. (my2cents) |
|
|
Congratulations, you are done. |
|