Regal Angelus Guitar

I have repaired an old Regal Angelus resonator guitar (1933-36) that I've had laying around for a long time. This page shows the project to replace the neck with pictures during and after completion.
(Click on the picture for a larger view)
Here is a picture of mine with the new neck
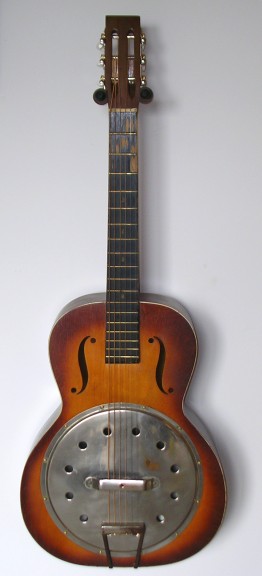
Mine needed a new neck since the headstock broke off and was missing. I got one from another guitar (thanks Paul!) that is the same scale and will fit this guitar with a little work on the dovetail joint.
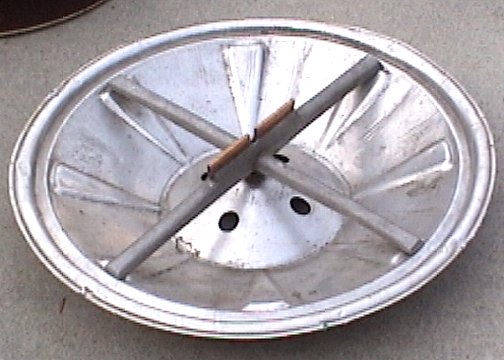
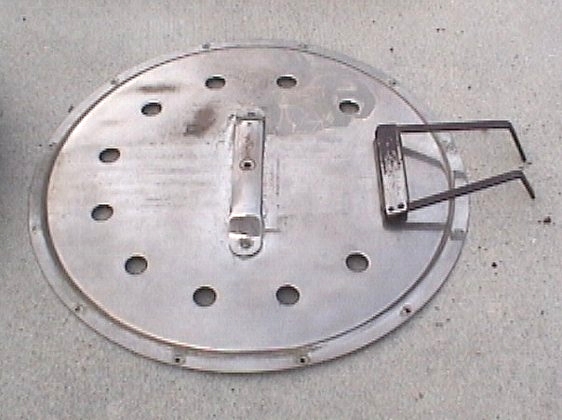
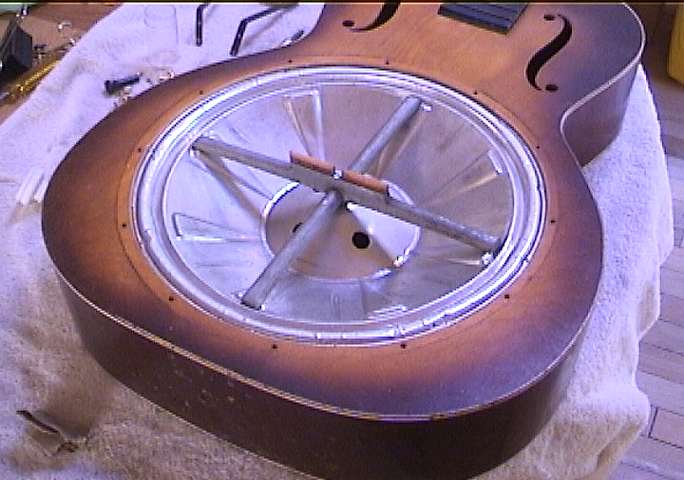
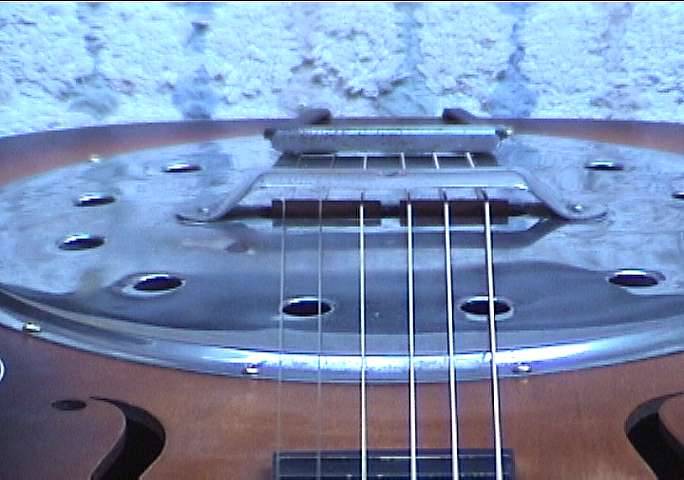
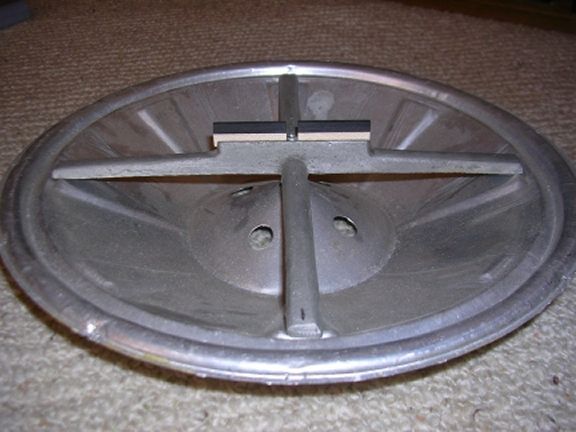
This is the original cone, spider, cover plate and tail piece. After some discussion with various folks, I decided to try the original setup and see how it sounds before I think about upgrading anything. My initial test sounded pretty good. It has better tone than a similar model that I played in a shop. I'm going to keep this cone for a while and compare it to a few others.
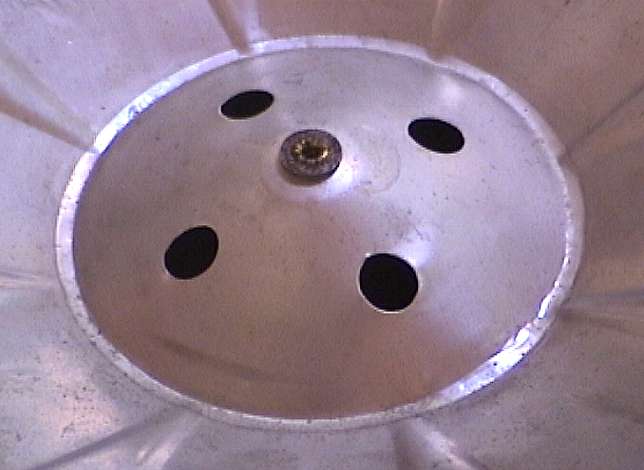
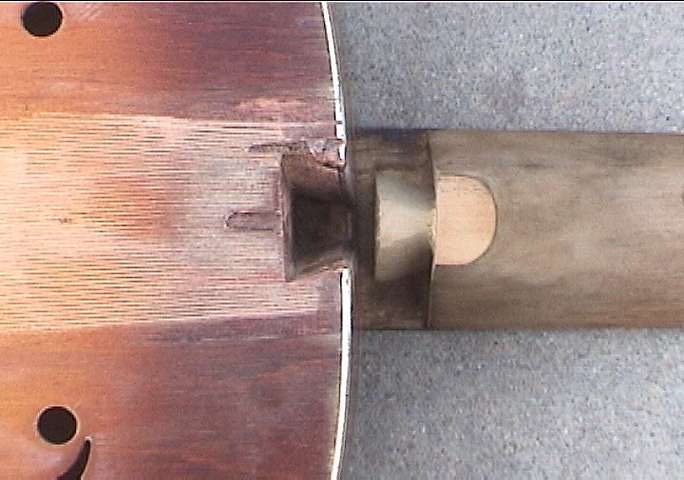
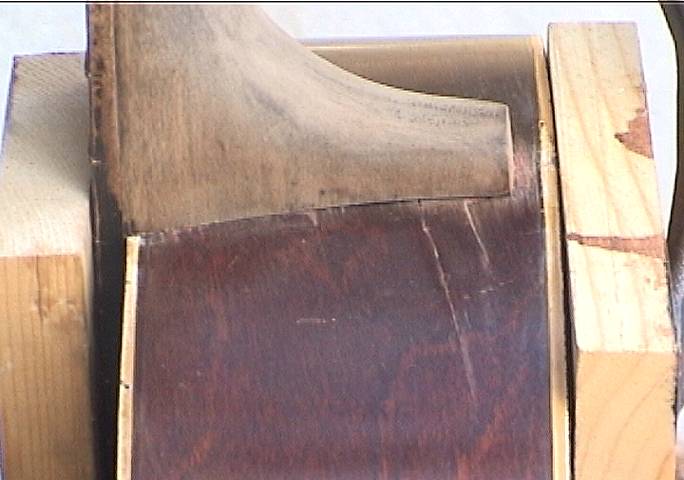
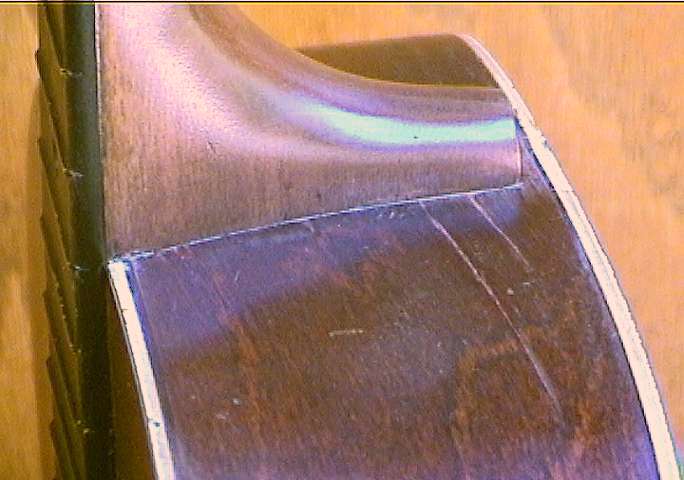
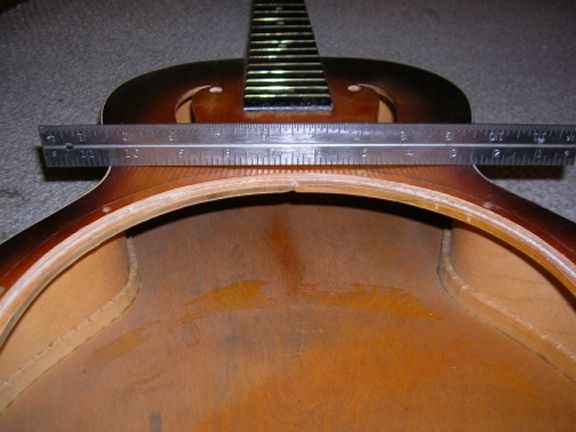
This is the body and neck joint. Notice that there is no sound well, instead there is a little shelf attached to the underside of the top that the cone was tacked to. Evidently this was common in lower priced Regals.


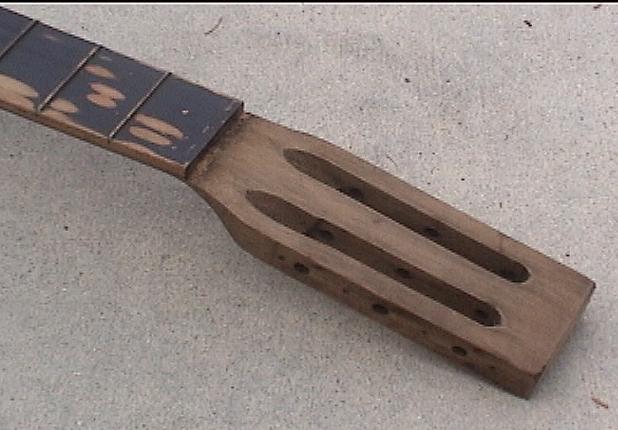
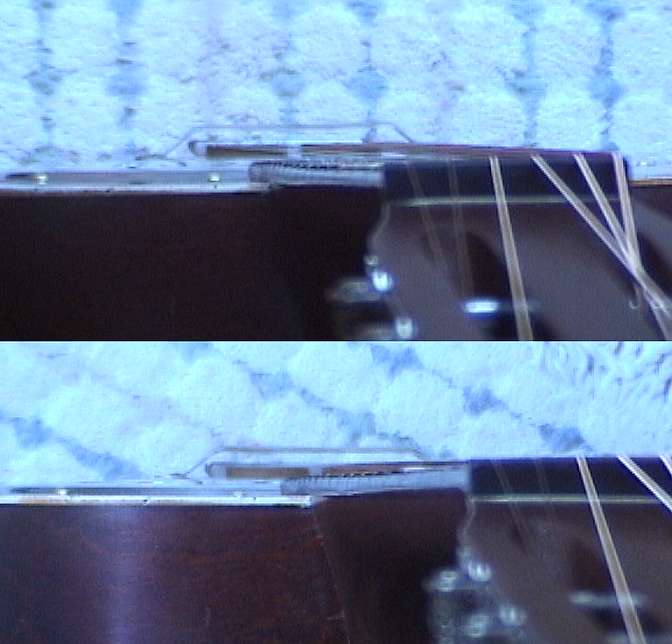
These are the dovetails on the original neck (left) and the replacement (right). Notice the tongue on the right is a little shorter due to being one fret less than the original even though they are both 25" scales. The replacement dovetail was thicker than the original which allowed me to shave it down to fit.
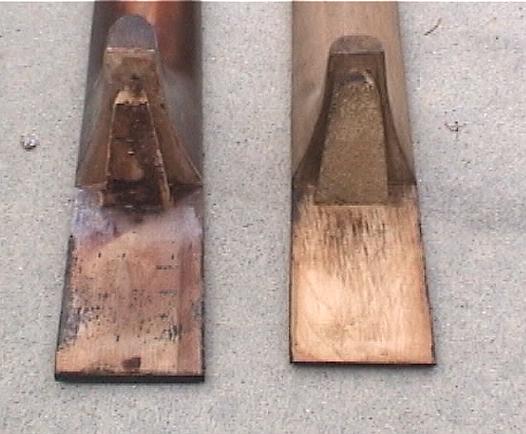
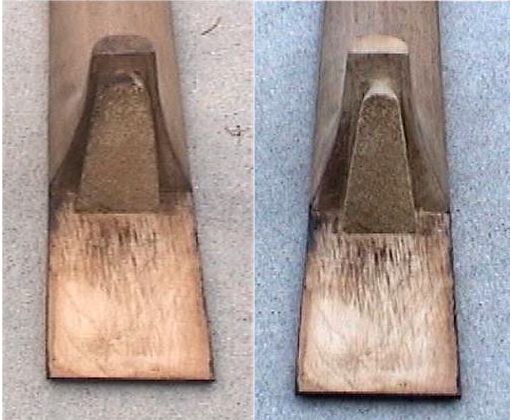
This is the before and after photo of the replacement that I shaved down with a nice sharp chisel. And a close-up of both sides of the joint.
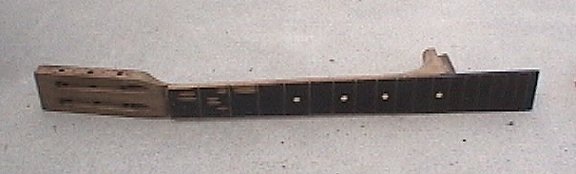
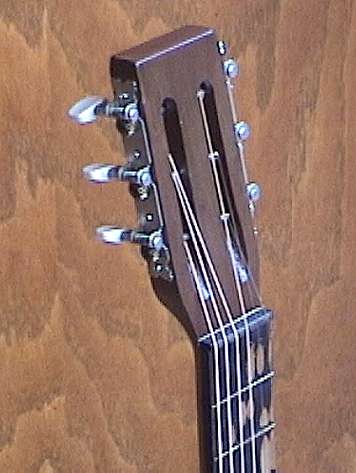
This is the front side of the replacement neck. The fingerboard is ebonized and is worn through in several places. The back and headstock have been stripped of their black lacquer finish. I stained and finished it with a semi-gloss lacquer before attaching it to the body.
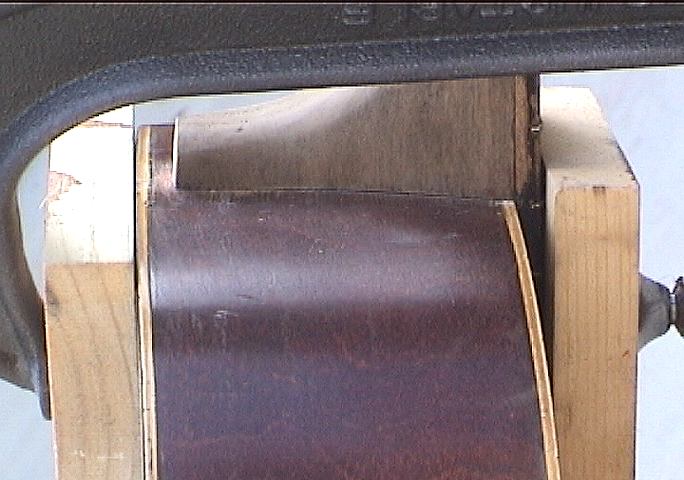
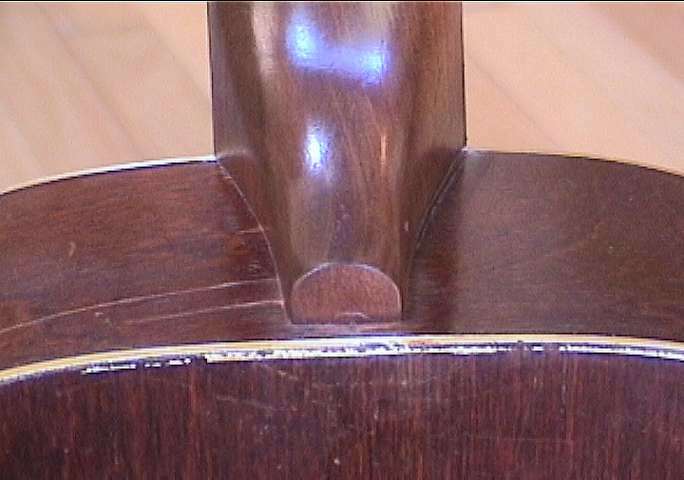
Here are some pictures of the dry fit clamp up and the actual glue up with hot hide glue. I pre-heated the wood with a heat gun before I applied the glue which was at 145 degrees F. The left picture shows two cracks that occurred when the neck block cracked. Probably the same time the original head stock was cracked. I was able to glue it back together and got it pretty tight prior to the neck installation. There's a slight dip in the side from top to bottom that can be seen near the cracks. I was able to fill it and have it less noticeable. I didn't want to take anymore off the heel, since I would have to take more off the other side and that would make the dovetail looser.
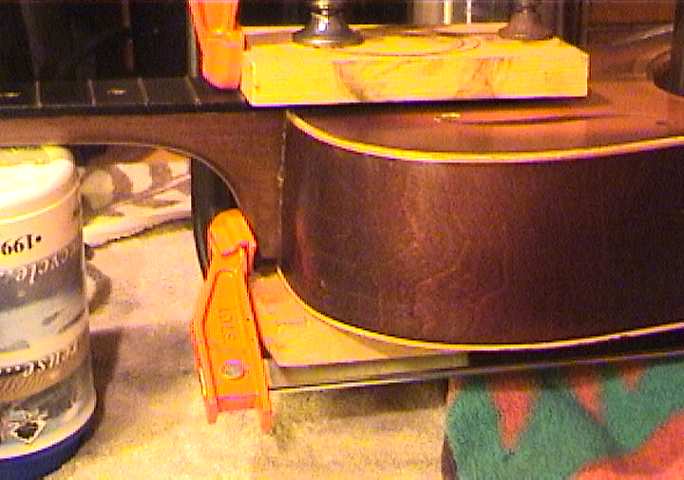
And here's the results after cleanup and filler.
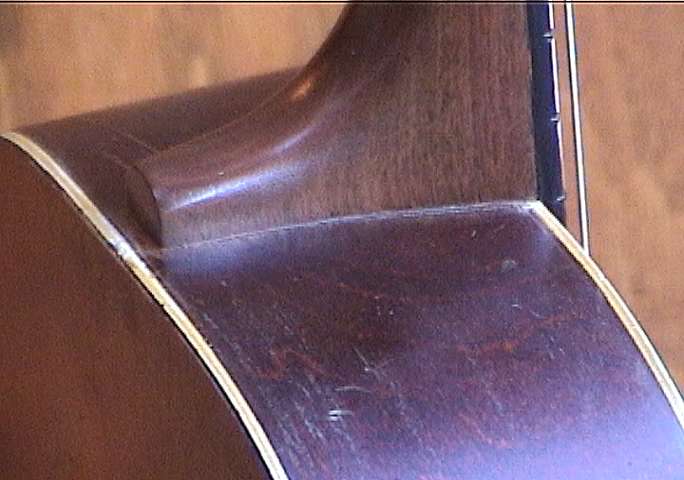
The neck angle is pretty good with a straight edge landing just above the spider when pressed into the cone to simulate string tension. The neck did have a slight forward curve to it, but I was able heat up the finger board and clamp it back to fairly straight. I checked the relief after I got it under string tension and it looks pretty good.
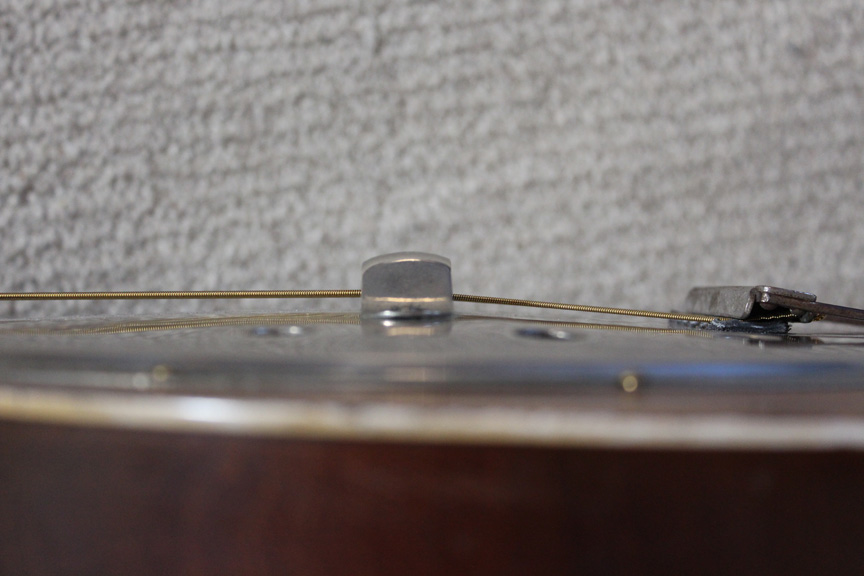
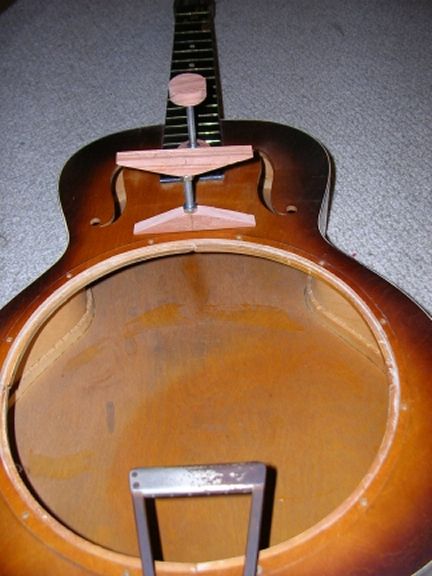
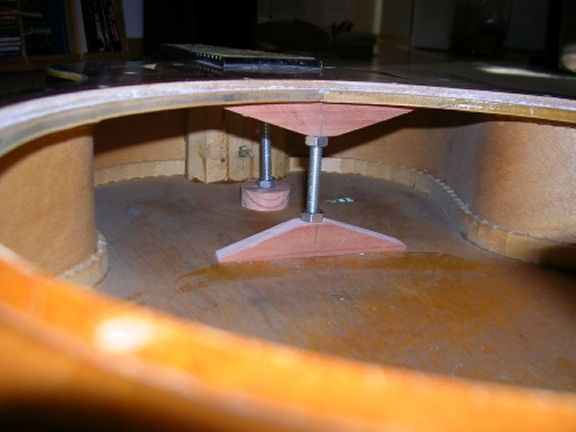
(Updated 9/20/04) There was a problem with the top being warped which was worse under string tension. I decided to put in some supports to correct this. I also replaced the bridge inserts with ebony capped maple ones. I adjusted them by sanding them down and making "V" grooves for the strings which I spaced the same as the tail piece holes since the other grooves were spaced too wide IMO as seen in the photo above. The nut needs to be replaced at some point but I don't have the tools (nut files) to make a new one yet. I dressed up the frets some more by leveling them and rounding off the tops. They are bar type were not rounded on top. My fingers kept tripping over them. It plays a lot better now and has more tone to it. Overall I'm very happy with it. Here's a few new pictures of the work.
I welcome any comments, tips and questions you may have.
This is the description from Gruhn's Guide to Vintage Guitars, 2nd edition, page 12/13.
Chapter - Dobro
California Made Models
No. 19/Angelus: birch body, f-holes, 12 large round holes in coverplate, some with binding, some with painted top and back edges to simulate binding, 12 or 14 frets clear of body, slotted peghead, some with Angelus on peghead, 2-tone walnut finish
Introduced (also made by Regal): mid 1933
California production discontinued: 1937
Model 19 continues in Regal-made series (See following)
Regal - Made Woodbody Models
Angelus: birch body, 3-segment f-holes in upper bouts, 12 large holes in coverplate, slotted peghead, painted top and back edges to simulate binding, 12 frets clear of body, roundneck or squareneck, some with Angelus on peghead, dull walnut finish (later with natural finish or orange-to-brown sunburst finish)
Available (also available in California-made series): mid 1933-36
And here are a few excerpts from an article on Vintage Guitar.com that describe some of the of features of this guitar;
"Dobro often economized on guitars carrying other brands by installing no soundwells under the resonators or by cutting f-holes instead of installing screens. According to Emil Dopyera, part of the thinking was that if a guitar did not have the Dobro emblem it should not have the full Dobro sound."
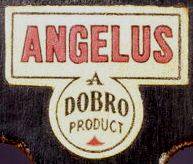
"The Model 19 was Dobro’s cheapest resonator guitar - so cheap that it didn’t carry the Dobro emblem. Its decal said, “Angelus, a Dobro Product.” It had no soundwell and smooth-sided f-holes instead of screenholes. The Angelus coverplate had a simple design of 12 round holes at the clock points."
"That year [1937] Regal replaced the budget Model 19 with the Model 25, which had top and back binding and pointed f-holes"
The complete article can be found at;
A Guide To Vintage Dobros By Tom Gray
Feel free to sign my Guestbook or Email me
You are visitor number Since 1/19/04